Idli

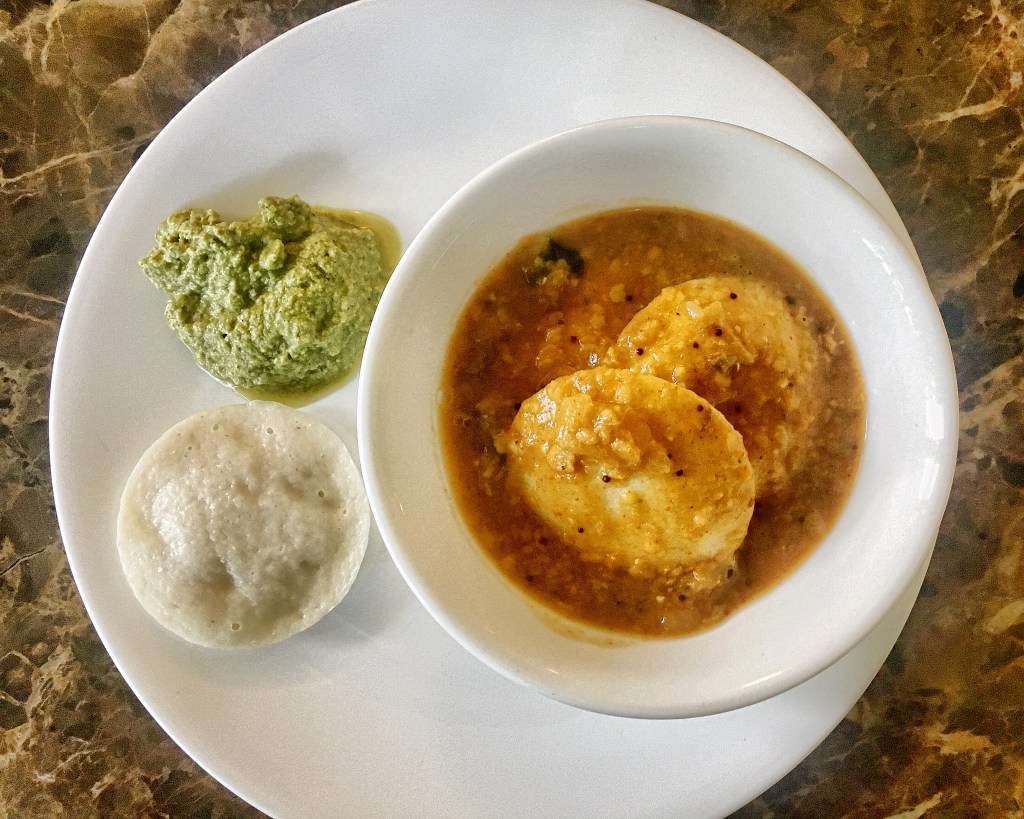
My favourite comfort food. Breakfast, lunch or dinner – I can eat idlies at any time. I make an idli batter almost every weekend for a leisurely breakfast followed by coffee.

IMG_2359

This recipe does not use cooking soda – I detest soda as it invariably makes me feel uncomfortable and bloated. The picture above was taken with the last remaining  idlies, sambar and chutney. Will try to replace this picture next week.

Using Idli rice might give you fluffier idlies but on most occasions I use the normal indrayani or kolam rice available at home. Use any rice – texture might differ but taste will rarely vary.

Ingredients

1/2 cup Split Urad dal (split black gram)
1 cup Rice
1/2 tbsp Methi seeds (Fenugreek seeds)
1 cup cold cold water
Salt, to taste

Procedure

  1. Wash the rice and dal thoroughly.
  2. Soak them separately (add the methi seeds to the dal) for at least 4-5 hours.
  3. After 4-5 hours drain and mix together. Grind them in a mixer/grinder adding 1 cup of cold water gradually. The final batter should be smooth, frothy and slightly coarse.
  4. Put the batter in a steel or ceramic bowl. Add salt and mix batter with your CLEAN hands. This will help fermentation.
  5. Cover the bowl (not airtight) and keep in a warm place for at least 10-12 hours until it ferments. Check for salt after it ferments and add more to taste.
  6. Take an idli steamer (a steamer with round idli moulds). Boil some water in the bottom half of the steamer.
  7. Grease the idli moulds with ghee and spread a little batter in each of them. Place the moulds in the steamer.
  8. Steam for 10-12 minutes. Remove the moulds and cool for a few minutes before serving hot idli with sambar and chutney.

I have a few wicked recipes for sambhar and chutney. That will be another day, another post. Until then get your idli batter ready. The process might sound daunting but it is actually quite simple and totally worthwhile. Readymade batters use preservatives and soda bicarb which I think are totally unnecessary and unhealthy.

I also add extra water to turn this into a dosa batter or I fry the extra idlies with onions, red chillies and curry leaves. There are times when kids love just idli fry (idli deep fried) or idli with sweet yoghurt (dahi idli).

To each his own


Undhiyu – With Love to my Darling Mother!

First it was my father-in-law’s closely guarded secret – Yusuf’s Kate Masale ka Gosht. This time it is my mother’s secret recipe that I have tried to re-create here. I cooked this for lunch and well, it came close to her brilliance!!! The missing ingredient was perhaps a mother’s love! This recipe is a tribute to the selfless caring and unconditional love that will need many lifetimes to partly reciprocate.

A ‘gujju’ favorite!

This is a recipe that is found in most gujarati thalis or gujarati weddings. The version here is much lighter and less sweeter than most gujarati homes. If you wish to replicate the sweet gujarati flavor add more oil and a greater quantity of sugar!

Flat Beans or Papdi

Some of the ingredients are usually seasonal (particularly the flat beans (papdi) and yam (kand). These can be replaced with a different variety of yam and similar beans. The authentic recipe also features fresh garlic (kachcha lehsun) but for the sake of convenience I have used regular garlic cloves. If you do find fresh garlic make sure you reduce the quantity as it can get very, very strong!

Yummy!!!

Ingredients 

½ kg Potatoes (Aloo), diced
½ kg Flat beans (Papdi), stringed and halved
2 Raw bananas , diced
100 gms Yam (Kand/Suran) , diced
3 Baby brinjals (Chote baingan) , diced into quarters
2 “ piece Ginger
4 cloves Garlic
4 Green chillies
1 tsp Turmeric powder (Haldi powder)
¼ cup Oil
Pinch of Asafoetida (Hing)
1 bunch Coriander leaves (Hara Dhaniya)
1 tsp Mustard seeds (Rai)
2 tsp Sugar or jaggery

For Muthiya:

¼ cup Bengal Gram Flour (Besan)
Small Bunch Fenugreek Leaves (Methi), chopped
½” Ginger, grated
1 tsp Red Chilli Powder
½ tsp Sugar
Oil to deep fry
Salt to taste

Procedure

  1. Make a rough paste of garlic, green chillies, ginger and half the coriander leaves.
  2. Mix all the muthiya ingredients except oil and prepare a firm dough.
  3. Divide the dough into small portions and shape each into rolls, and deep fry in hot oil. Remove and keep aside.
  4. Heat oil in a pan, add mustard seeds.
  5. When mustard seeds crackle mix in ground masala (step 1)  and all the vegetables except the beans. Mix well.
  6. Cover and cook this for around 5-7 minutes.
  7. Put the the beans in this. Add turmeric, asafoetida and salt. Stir fry for five minutes on high flame.
  8. Pour a cup of water, cover and simmer on a very low heat for 15-20 minutes or until the yam is totally cooked.
  9. Add the fried muthiyas and sugar/pounded jaggery. Simmer for 15 minutes shaking occasionally.

Serve hot with bajra ‘rotlas’ or phoolkas laced generously with hot ghee!

Chaas – The Pacifier!

 Cold Chaas (buttermilk) with freshly roasted, ground cumin and salt is a great accompaniment with this meal. To make it even more rustic take some fried green chillies and lumps of jaggery with this meal. It is recommended that you schedule a siesta after this meal as you are sure to feel drowsy after a sumptuous gujju meal!

Mirchi ka Salan – my style!

Ingredients

10 ‘Bhavnagri’  Green Chillies / Large Green Chillies, sliced or slit lengthwise
1/2 cup Peanuts
1 tsp Sesame seeds (Til)
1 tsp Cumin seeds (jeera)
2 tsp Coriander seeds (Dhania)
1/2 cup Grated coconut
2 Medium Onions, roughly sliced
3 tsp Ginger-Garlic paste
2 tsp Tamarind paste
1 cup Yoghurt 
5 tbsp Oil
Salt to taste
Water

Procedure

  1. Roast the sesame seeds, cumin seeds, coriander seeds and peanuts. Keep aside to cool.
  2. Take 1 tbs oil in a pan. Fry the sliced onions until they turn transparent. (Do not let them turn brown). Keep aside to cool.
  3. Blend the fried onions, grated coconut, roasted peanuts, sesame seeds, cumin seeds and coriander seeds to a paste. Add some water (approx 1/4 cup) to make the blending easier.
  4. Heat 2 tbsp oil in a pan. Fry the chillies for approx 4-5 minutes on a medium flame. Keep the chillies aside.
  5. In the same pan heat the remaining oil. Fry the blended masala paste with ginger-garlic paste and tamarind paste for approximately 4-5 minutes.
  6. Add the yoghurt to this and mix. Make sure the yoghurt is completely incorporated into the paste.
  7. Add the fried chillies to this. Mix and add 1 cup of water.
  8. Boil for 5-6 minutes. Turn off the heat and keep the pan covered for 5 minutes.
  9. Serve with paratha or rice.

I love the Bhavnagari chillies for their correct amount of ‘hotness’. You can use any other variety of green chillies. You can also de-seed them to make the chillies milder. The real fun though is in the salan. It is tangy, hot and delicious. Replace the chillies with eggplant and you have Baingan ka salan!

I am not sure about the authenticity of this recipe but I know that it is truly delicious. Try it!


Non-Spicy Cabbage Poriyal – Simple, light and vegetarian!

cabbage-2
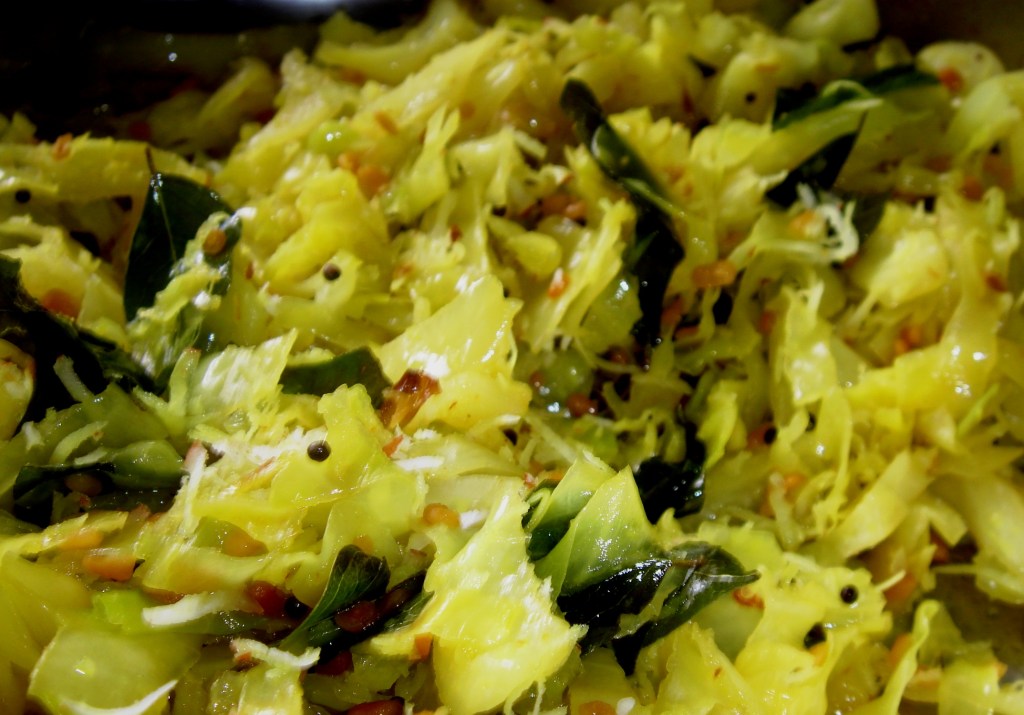
Ingredients

1 Medium Cabbage, chopped
3 tsp Oil
1 tsp Mustard seeds
2 tsp Urad Dal
8-10 Curry Leaves
2 tsp Turmeric powder (Haldi)
Salt, to taste
1/2 Grated coconut
Water

Procedure

  1. Heat the oil. Add the urad dal to this.
  2. When urad dal turns brownish add mustard seeds.
  3. When the mustard seeds begin to sputter add curry leaves and turmeric powder. Fry for 2-3 mins.
  4. Add the cabbage. Mix well.
  5. Add salt and approx 1/2 cup water. Cook without covering until cabbage is fully cooked.
  6. Add grated coconut. Fry for 1 minute. Serve hot.

So simple. That is what I love about this dish. Quick, attractive, delicious, light and great with hot phoolkas. You can sprinkle lemon juice on this before serving.

Since my mother is unable to tolerate spicy food my recipe does not include red chilli powder and coriander powder. You can add these along with turmeric powder. I still prefer the masale-free version.

Kadhai Paneer – A gujju favorite!

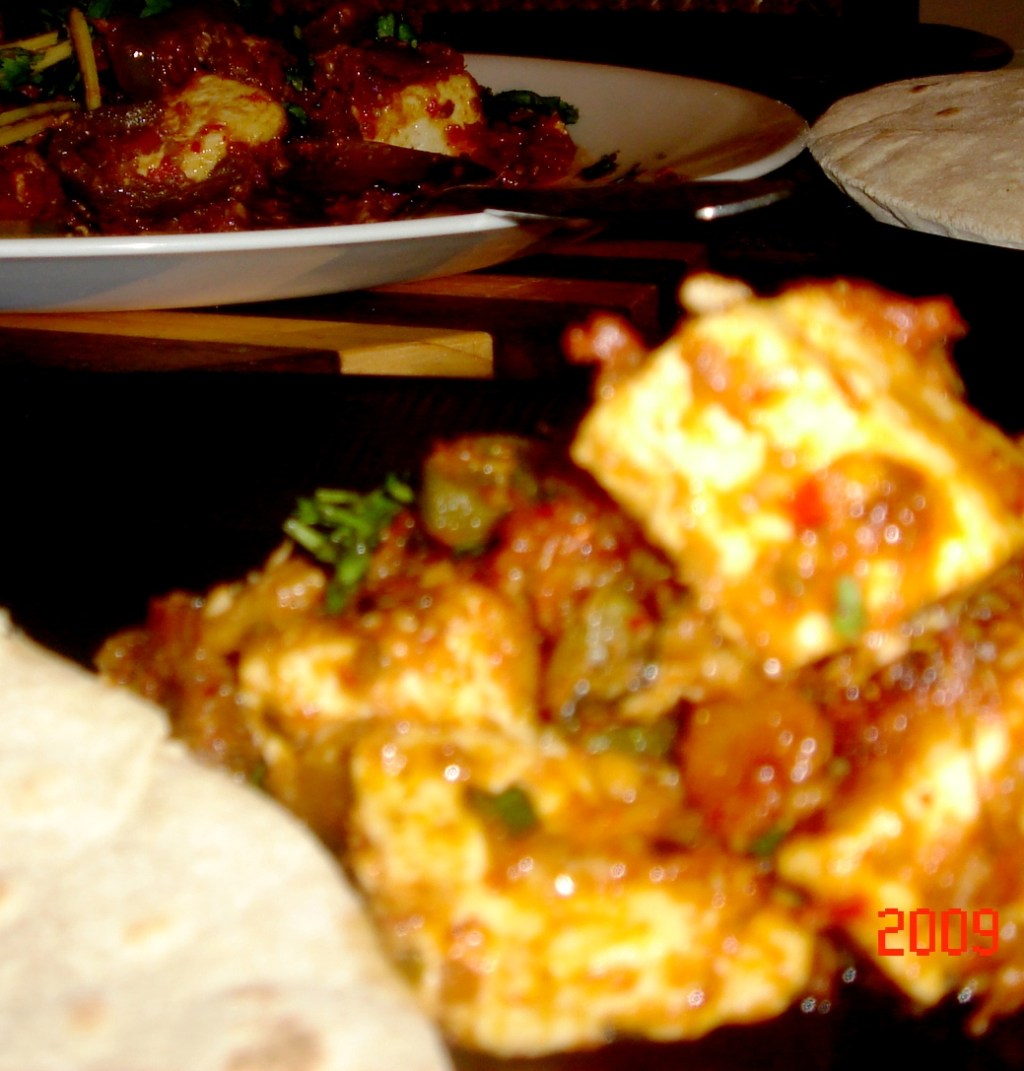
For the Kadhai Paste

INGREDIENTS7 tbs Coriander seeds
10 Dried Red chillies
3 tbs Garlic Paste
¼ cup Ginger, chopped
5 Tomatoes, chopped
4 tbs Ghee
1 tbs Dried fenugreek (Kasoori Methi)
1 tsp Garam Masala Powder
Salt

PROCEDURE

  1. Dry- grind the coriander seeds and red chillies
  2. Heat the ghee in a kadhai (wok). Fry the garlic pasteon medium flame  till it turns golden brown.
  3. Fry the chopped ginger and coriander seeds- red chillies powder in this for around 45 seconds.
  4. Add the chopped tomatoes and salt. Mix and fry this on medium flame while stirring continuously.
  5. Fry till the ghee separates from the masala.
  6. Add the dried fenugreek (kasoori methi) and garam masala powder. Mix.
  7. Keep aside.

For the Kadhai Paneer

INGREDIENTS

500gms Fresh Cottage Cheese (Paneer), cut into medium size cubes
3 tbs Ghee
1 large Capsicum, deseeded and julienned
3 tsp Coriander seeds
5 Dried Red Chillies
Kadhai Paste (above)
A pinch of dried fenugreek (Kasoori Methi)
1 tsp Garam Masala Powder
¼ cup Fresh coriander, chopped

PROCEDURE

  1. Dry grind the coriander seeds and dried red chillies to a fine powder.
  2. Heat the ghee in a kadhai (wok). Stir fry the capsicum on high flame for 30 seconds.
  3.  Add the chopped ginger and coriander-red chillies powder to this and fry on medium flame for around 1 minute.
  4. Add the Kadhai Paste prepared above. Fry till the oil separates from the masala. This should take around 4-5 minutes at the most.
  5. Add the paneer to this and mix gently. Cook while stirring gently for 2-3 minutes.
  6. Sprinkle the dried fenugreek (kasoori methi) and garam masala powder. Adjust the seasoning if required. Mix.
  7. Serve hot garnished with fresh chopped coriander.

This is quite a hit with my gujju guests!  Tastes just like the kadhai paneer you get in restaurants (better if I can be immodest!) and despite the gujju preference for this dish I must admit that it is truly delectable. Experiment with other vegetables for kadhai vegetable and also with chicken to get kadhai chicken. Just try it! It goes brilliantly with any hot, fresh bread.kadhai paneer

Hansal’s Palak Paneer

Yummy!
Yummy Palak Paneer!

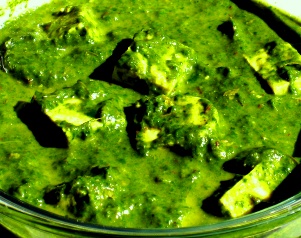
INGREDIENTS

2 large bunches  Spinach (Palak), stems removed
250g Fresh Cottage Cheese (Paneer), chopped into medium cubes
4 tbs Oil
4 tsp Garlic, finely chopped
1 large onion, chopped
1 tsp Ginger, finely chopped
4 medium tomatoes, chopped
3 tsp Coriander Powder (Dhania Powder)
2 Green Chillies, deseeded and chopped
1 tsp Garam Masala Powder
2 tsp Fresh Cream
Salt

PROCEDURE

  1. Boil 3-4 cups of water. In the boiling water put the spinach for exactly 1 minute.
  2. Strain the hot water and immediately cool the spinach in running cold water.
  3. Make a puree of the blanched spinach using a blender.
  4. Heat 2 tbs oil in pan. Add garlic and fry until golden.
  5. Add the spinach puree and salt. Sauté on medium flame until spinach is nearly cooked.
  6. Heat the remaining oil in another pan. Fry the onions until golden brown.
  7. Add the chopped ginger and fry for about 1 – 2  minutes.
  8. Add the chopped tomatoes, green chillies and coriander powder.  Sauté over medium heat until the oil separates from the masala.
  9. Add the cooked spinach and garlic puree to this. Mix. Add approximately 1 cup of water and bring to a boil.
  10. Mix and cook for 5 minutes on medium flame.
  11. Add the paneer cubes and cook for another 2-3 minutes.
  12. Sprinkle the garam masala and mix. Cook for 1 minute.
  13. Remove the pan from heat and mix the fresh cream.
  14. Serve hot.

This is a mildly spiced recipe that is entirely my own. The blanching process is necessary to maintain the fresh green color of the spinach(palak) without adding stupid color. I try to avoid cream and also try to reduce the quantity of oil (if I am dieting!). Although I prefer using fresh and soft cottage cheese (paneer), my father-in-law prefers the cottage cheese (paneer) deep fried. Take your pick!